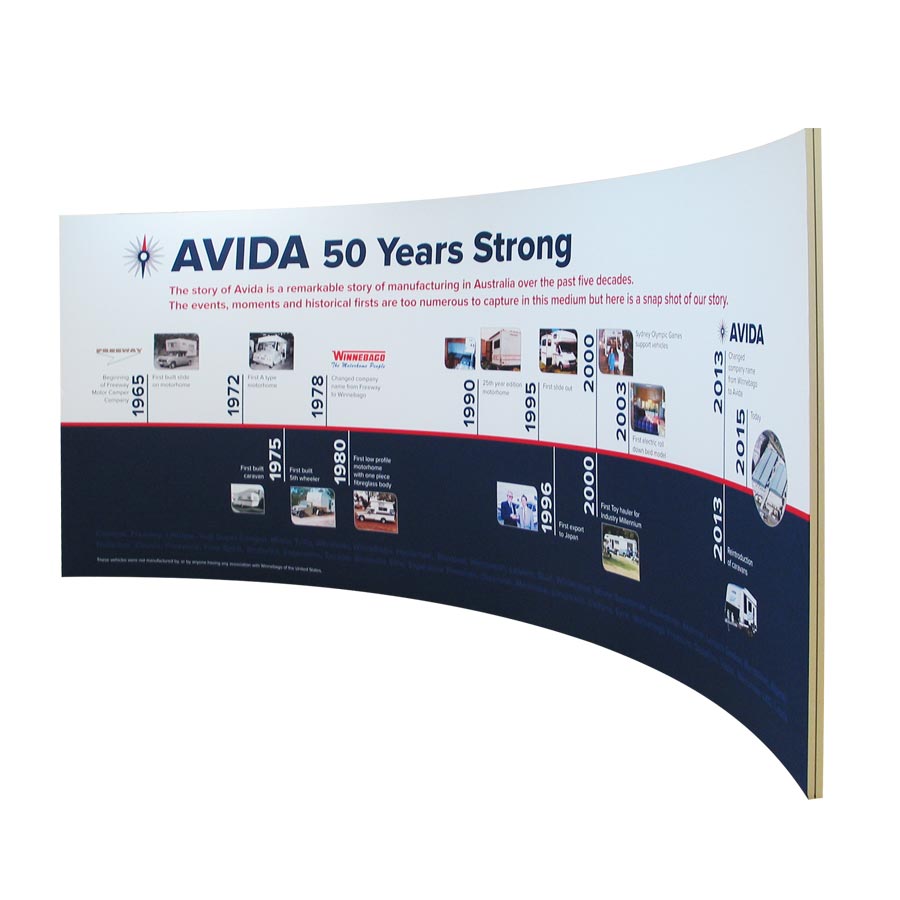
 Curved TexFrame")
This guide will provide you with the knowledge required to assemble our Double Sided (D46) TexFrames - in this instance we'll be using a custom built frame to demonstrate this.
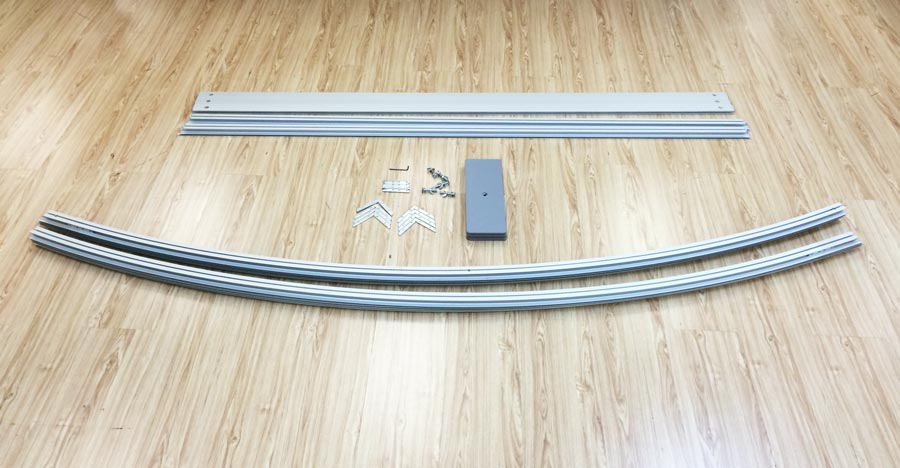
When you purchase a TexFrame system from us all that you need will be supplied! For this display there will be:
- 2 x 2000mm straight extrusion lengths (these are for the sides of the frame)
- 4 x curved extrusion lengths with a radius of 1500mm (these are for the top & bottom of the frame; 2 lengths will have holes in them indicating that these lengths will be used for the bottom of the frame with feet)
- 3 x vertical support beams
- 1 x tension lock (used to lock the vertical supports in place)
- 5 x flat metal bases with bolts & wing nut fasteners
- 8 x L connectors
- 8 x InLine connectors
- 1 x alen key
|
Step 1: The first step is to assemble the bottom curve of the frame. As mentioned of the 4 supplied curves 2 will have holes in them; these 2 curves (with holes) will go together to make the bottom edge of our frame. Insert 2 of the supplied InLine connectors into the extrusion and then slide the extrusion so that both pieces sit flush together. Use the alen key to tighten the grubs on the connectors.
NOTE: you may notice that the join seperates slightly as you tighten the grubs, this is due to the two lengths being curved. Not to worry; the small gap will be hidden once the graphic is inserted. |
 |
|
Step 2: Repeat Step 1 to complete the assembly of the curve for the top section of the frame. Note: each length of curved extrusion also comes with a 150mm length of straight extrusion. For the purpose of this frame (and all frames that have this extra length) we will supply the lengths already assembled. However if you need to remove them and/or reassemble them simply use the process outlined in Step 1 to do so. |
|
Step 3: Now we move on to the next step which involves connecting the feet to the bottom curve. Each foot will come with a bolt, a washer & a wing nut. Insert the bolt through the hole on the foot so that the bolt's head is counter sunk into the foot. While raising the extrusion slide the foot under and align the bolt with the hole on the extrusion. |
 |
|
Step 4: With the foot in place & the bolt inserted through the extrusion all that's left is to place the washer over the bolt and use the wing nut to fasten the foot in place! |
 |
|
Step 5: Simply repeat the above steps to complete the assembly of all the supplied feet. |
 |
|
Step 6: Now we move onto attaching the two straight lengths of extrusion to the sides. Insert the L connectors into the bottom curve and then slide the side length into position. After aligning the two edges to make a neat 90° tighten the grubs with the alen key. Repeat this for the opposite side of the frame. |
 |
|
Step 7: Next we insert the middle vertical support beam (in preperation to attach the top curve). Insert the clasp on the end of the beam into the centre channel on the extrusion. Then use the tension lock key to tighten the beam in place. Note: for the middle support beam we recommend affixing it over the join of the two curved lengths / directly above the InLine connectors. This will help to give the join extra stability & strength. |
 |
|
Step 8: With three vertical points attached we can now secure the top curve to the frame. After lifting the curved length of extrusion(s) rest the middle on the centre vertical support beam. Then repeat the steps outlined in Step 6 to secure the ends to the sides of the frame. Remembering the lock the clasp of the centre vertical support once the corners are done. Note: for this step we recommend that 2 people do this, this will provide more support for the join and will prevent the InLine connectors possibly bending due to an imbalance of weight. |
 |
|
Step 8: All that remains is to insert the 2 remaining vertical support beams into place! In this instance the two feet represent the middle of the individual curves, so fixing the support beams near the bolts for these feet is the best location to lock the beams into place. And there you have it! Your double sided frame is assembled and ready to have its graphic inserted. |
 |
|
Graphic Insertion BEFORE STARTING: Please wash your hands! While we clean all extrusion before handing it to clients, during the assembly process your hards are undoubtedly going to pick up some dust & dirt. Unfold the graphic, being careful to minimise the contact it has with the ground - to avoid leaving unslightly scuffs or dirt marks. Start by inserting the silicon into the extrusion's channels at the 4 corners. You just need to insert enough to hold the weight of the fabric. Next insert the middle of the graphic into the extrusion (both top & bottom). You can estimate whether you're inserting the middle by gauging how much material is hanging on either side. Remembering that the middle point of the frame will be the joins of the curves & (more notably) the placement of the centre vertical support beam. From there simply insert the middle of each insertion point. Continuing this process for the entire frame, including sides, until all you need to do is ease the small areas left un-inserted into the extrusion. |
 |
| For a more detailed instructional on how to insert your graphic please refer to our How To guide: Assembly Guide - Fitting Fabric Graphic to TexFrame |
 |
 |
 Posted by
William Qian
Posted by
William Qian
William Qian is a Specialist in Exhibition Graphics & Displays, and founder of ADI Displays with a vision in taking creativity through to visual reality.
From humble beginnings, he adopted the latest digital printing technology of its time, producing large format digital printing used for exhibition graphics and portable display systems.
With his love of the creative visual industry, he has established BANNERAD™ Range of Products to accommodate the growing needs of portable display solutions which have been successfully distributed in the sign and display industries.
“It is our focus and innovation that allows our continued success in meeting our customers’ display needs concerning application, preference and budget.”
